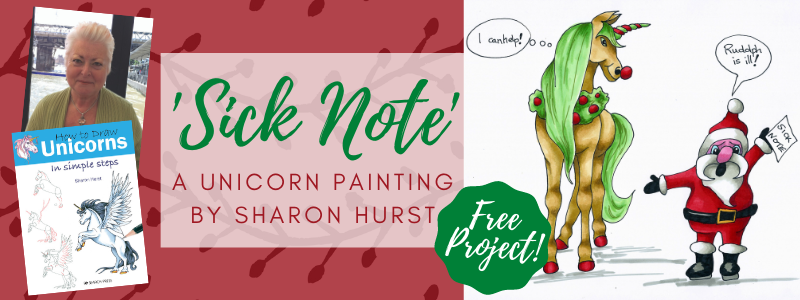
Hello! Welcome back to the world of Unicorns.
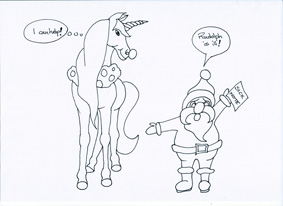
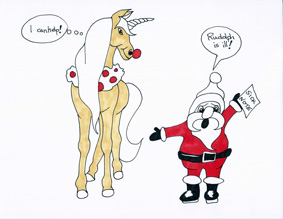
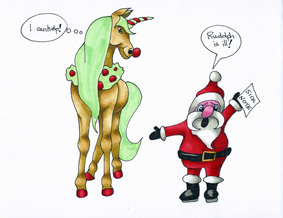
With Christmas coming, I thought it would be fun to try a picture that included Santa, with the idea that you may be able to turn this funny little painting into a card perhaps. I like a bit of humour, and usually I like to tell a little bit of a story in each drawing. Here we have the poor beleaguered Santa Claus trying to organise the sleigh and Rudolph calls in sick! What is to be done?
Enter our unicorn… dressed for the occasion, hooves all painted along with his horn and a coloured mane. He has found a red nose from somewhere, so what could possibly go wrong?!
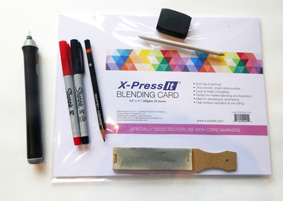
My Materials:
- Red and black fine pens (I’ve used Sharpies)
- Pencil
- Rubber
- A selection of pens (I’ve used stylefile copic markers)
- Blending card, 250gsm copic paper
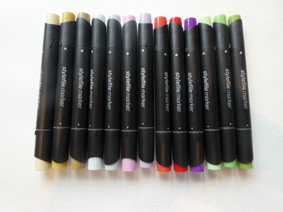
Colours:
- Red shades
- Purple
- Beige shades
- Grey shades
- Green shades
- Pink
 Instructions:
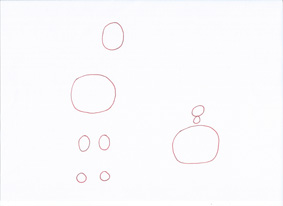
Step 1:
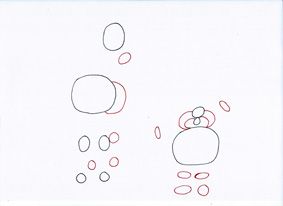
I started with our usual system of circles and easy lines. Take your time to draw out the picture, taking particular note of the distances between things to ensure that your spacing and perspective will be correct. Slowly, slowly it will build up. When you look at it as a whole, it can all be too daunting, but every picture is like a jigsaw puzzle. Simply do the bit that you can do and the rest will follow naturally, falling into place.

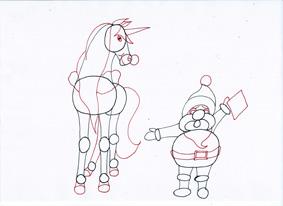
Step 2:
Once you are satisfied, take a fine Sharpie pen and ink in your pencil lines. Ignore lines that you don’t need in the picture, the lines that were only there to help you make the shapes. When you are happy with the result, run over it with a rubber and remove all the pencil marks.
Step 3:
At this point, I usually take a pencil and shade my picture so that I can get an idea of where I want my lights and darks to be. In this instance, I am imagining the light to be coming from the left-hand side as you look at the image. This means that my colours will be darker on the right.
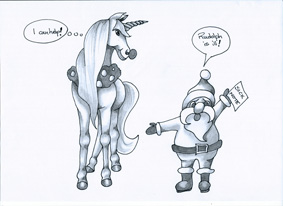
Step 4:
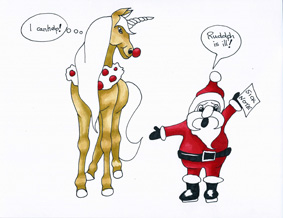
Now we can get down to the colour! Using a pale beige or cream I blocked in the colour of the unicorn. I then used a light red to paint in Santa’s outfit, the unicorn’s nose, and the berries on his wreath. I used my Sharpie for the black details.
Step 5:
I then took a darker shade of the same colours and used them for the shadows. Use the lighter colour to blend over the darker colour and it will give you a softer shading. Repeat this step with a darker shade again but in areas smaller than your previous shading. You can see this blending technique in my video 'How To Draw a Unicorn'.
Step 6:
Add a bit of pink on Santa’s nose and face and add a darker shadow on the bottom of his nose and under his eyebrows. I also used red to paint the unicorn’s horn and hooves and added a bit of shading to these too.
Step 7:
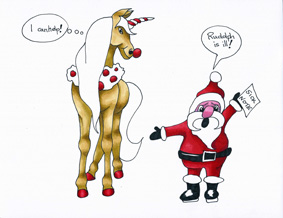
Two pale greys were very useful for the fur on Santa’s outfit. Using my tonal grey drawing to help me place the first pale grey, I put my shadows in. I used the darker grey in the same areas, but smaller and I then used the paler colour to blend the edges. The dark grey also went over the highlights on his boots and belt. A nice bright yellow was perfect for his brass belt buckle!
Step 8:
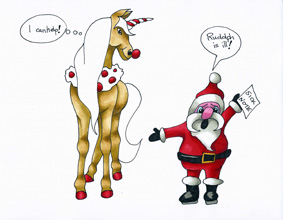
Going back to the unicorn, I used a lovely pale green for his mane, the wreath, and his horn. I didn’t worry about a smooth finish this time as I wanted the pen marks to look like hair. So be sure to follow the lines of the hair with the nib, using downward strokes. Don’t colour across the mane! The marks you make will give you the movement of the hair, so follow the contours of the black Sharpie pen.
Step 9:
Finally, I popped a few grey lines down underneath our characters otherwise they would have looked as though they were floating!
And there you have it! Something to make you smile, I hope.
Download and print this project in full HERE.
Thank-you for following our tutorial. If you have enjoyed it, there are lots of ideas in my book for you to follow. I am sure that you will have ideas of your own too. Don’t forget that we would love to see them, do send then in to either Search Press or I can be reached below:
Website: www.sharonhurst.co.uk
Amazon: www.amazon.com/author/sharonhurst
Youtube: SharonHurst
Facebook: @SharonHurstFantasyArt
How to Draw: Unicorns is available from Search Press, RRP: £4.99
Show us your Christmas crafts! Tag us @searchpress or use #SearchPressMakes, we'd love to see them!
Follow us on:


#SearchPressMakes