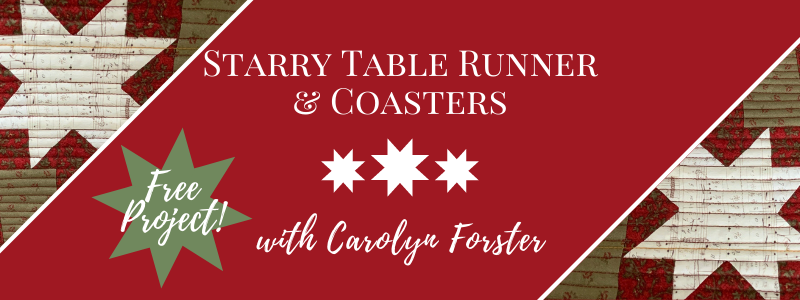
Spruce up your dining table this Christmas!
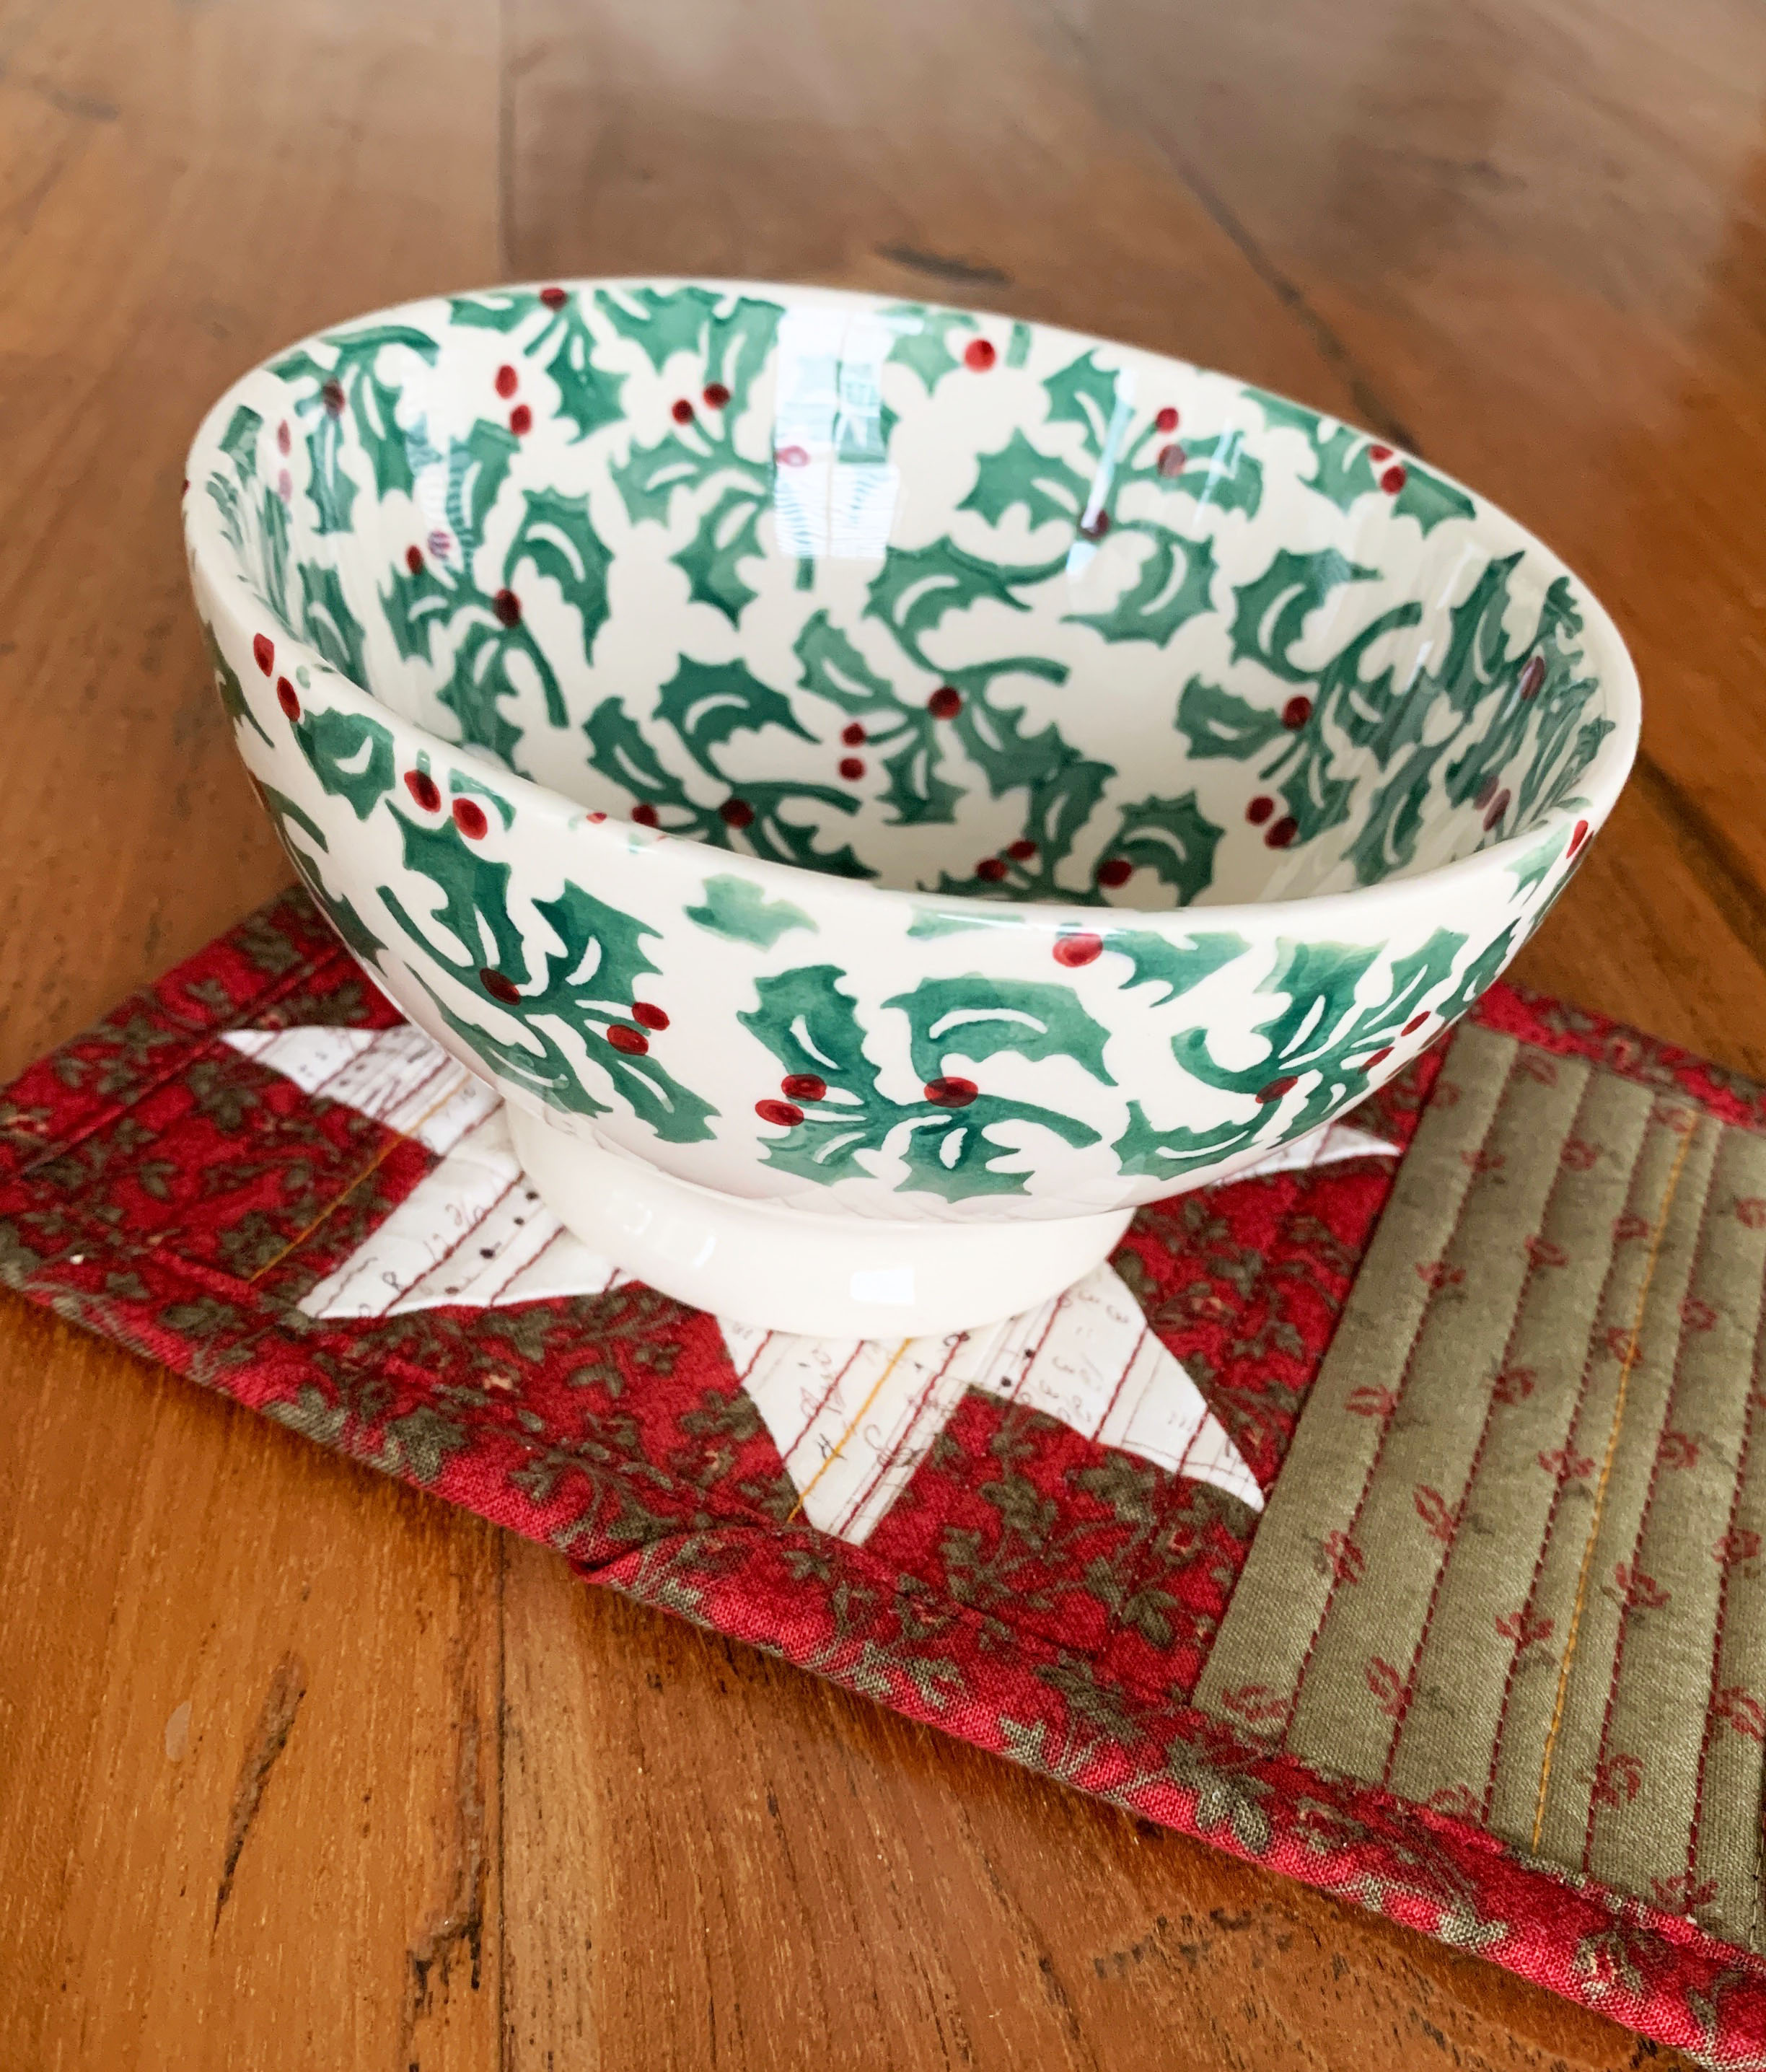
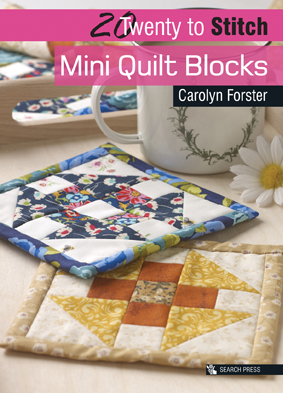
I used the little 5in (13cm) stars from 20 to Stitch: Mini Quilt Blocks as the starting point for this project. Adding the little border to one side makes this the perfect size as a coaster for your Christmas mug of tea or as a tablemat for the treats left out for Santa.
If you make 12 of them, they line up nicely as a festive table runner, without taking up too much space. The 12 stars put me in mind of The 12 Days of Christmas, but equally, depending on the length of your table, you could make more or fewer of them.
I used machine quilting and binding here to speed things up, as there are always plenty of other things to do come Christmastime! But the coaster and runner would look lovely hand quilted, too.
Materials - For one Coaster:
Finished size: 5½ x 7½in (14 x 19cm)
Fabric - Star:
Star background:
Border:
Heat-proof wadding/batting (such as Thermolam):
Backing:
Binding:
Notions:
-
505 Spray Baste
-
Machine quilting thread, 28 wt, for example
-
Jeans needles, size 100 or your preferred machine quilting needle
-
Binding clips
Materials - For the Table Runner:
Finished size: 7½ x 60½in (19 x 154cm)
Fabric - Star:
Star background:
Borders:
Heat-proof wadding/batting (such as Thermolam):
Backing:
Binding:
Notions:
-
505 Spray Baste
-
Machine quilting thread, 28 wt, for example
-
Jeans needles, size 100 or your preferred machine quilting needle
-
Binding clips

Fabric cutting:
Star centre:
Star points:
Star background, corners:
Star background sides:
Borders:
Heat-proof wadding/batting (such as Thermolam):
Backing:
Binding:
Notes: Press all seams open.
Method:
Step 1:
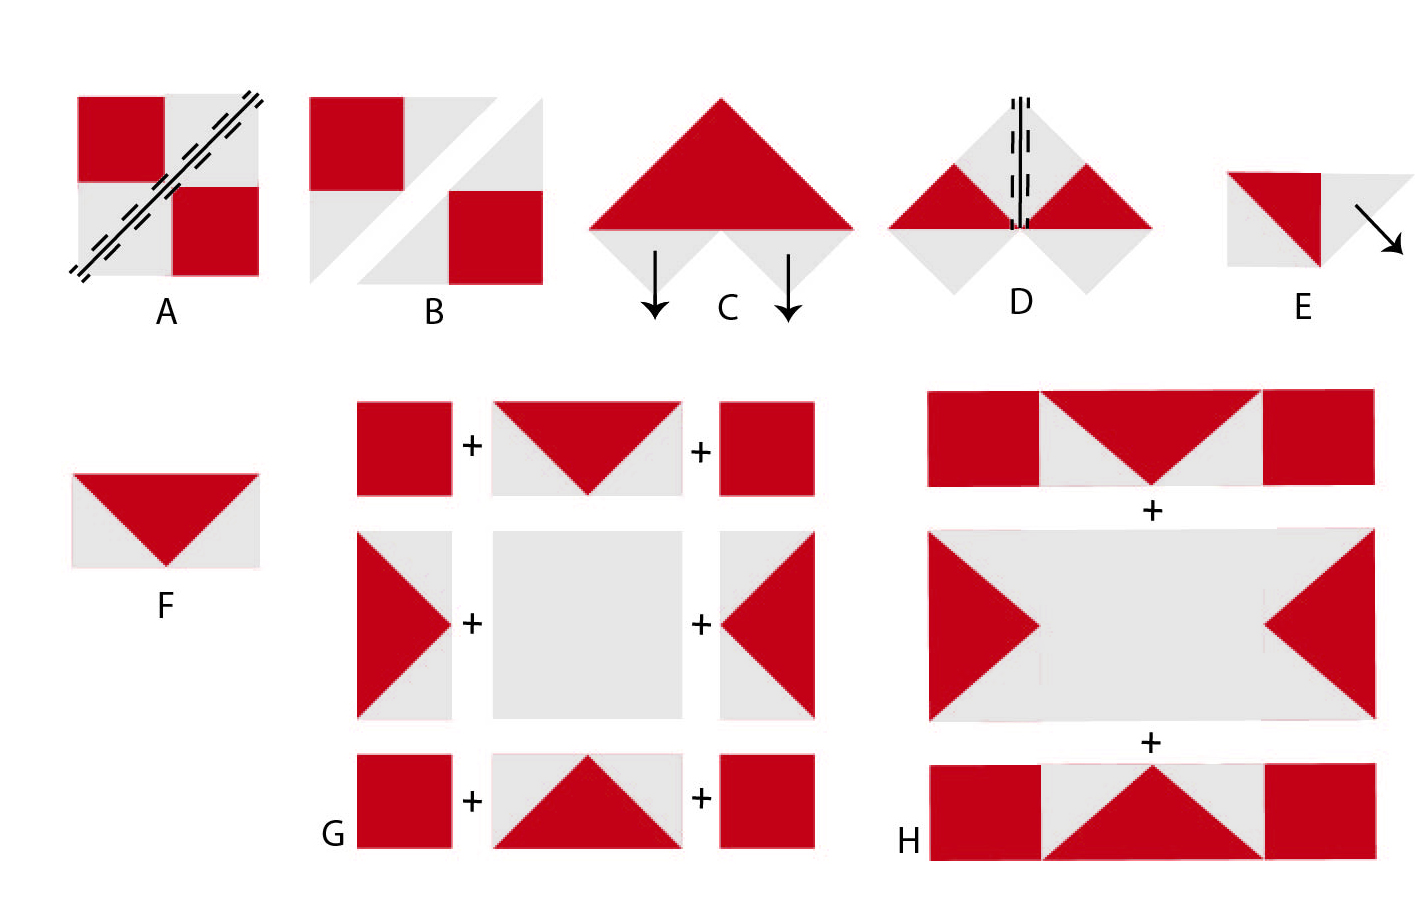
Here’s how to make one star, following the diagrams, below.
Draw a diagonal line on the back of each of the four 2in (5.5cm) star point squares with a fine, sharp pencil.
Place two of these right sides together with the 3¾in (9.5cm) background side square, placing one in the top right corner, and one in the bottom left corner – the pencil lines will match up.
Stitch ¼in (5mm) away from the pencil line, on either side (diagram A).
Cut along the pencil line to create two identical units (diagram B).
Fold down and press the units (diagram C).
Place each remaining 2in (5.5cm) star point square RS together with one of the units from diagram C, as shown.
Stitch ¼in (5mm) away from the pencil line, on either side (diagram D). Cut along the pencil line, then fold down and press the fabric (diagram E).
You will now have four identical ‘Flying Geese’ units (see diagram F).
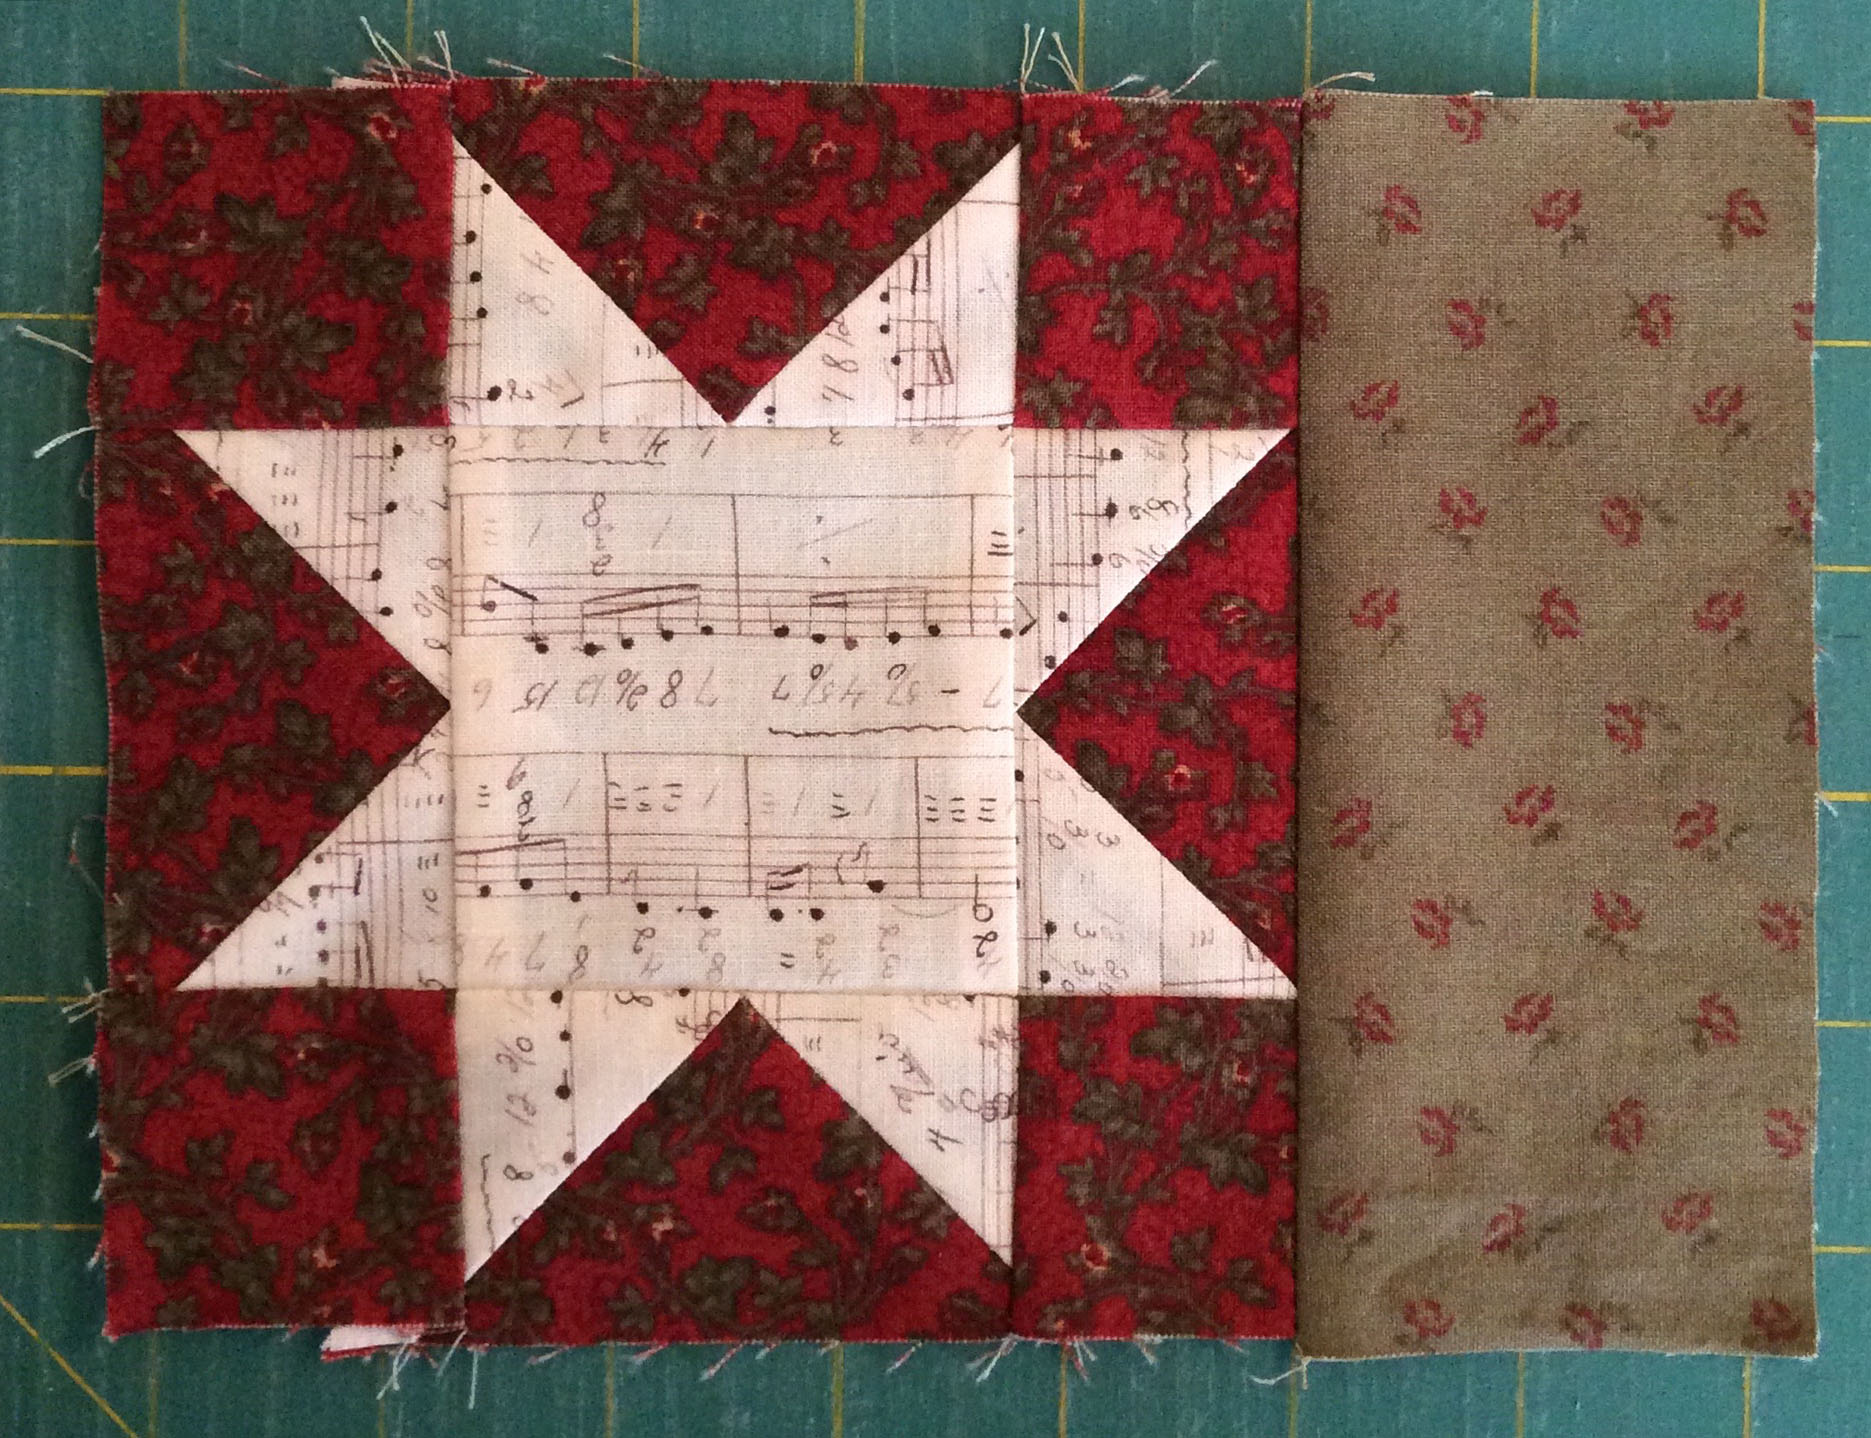
Assemble the star block as in diagrams G and H using the remaining star squares.
Step 2:
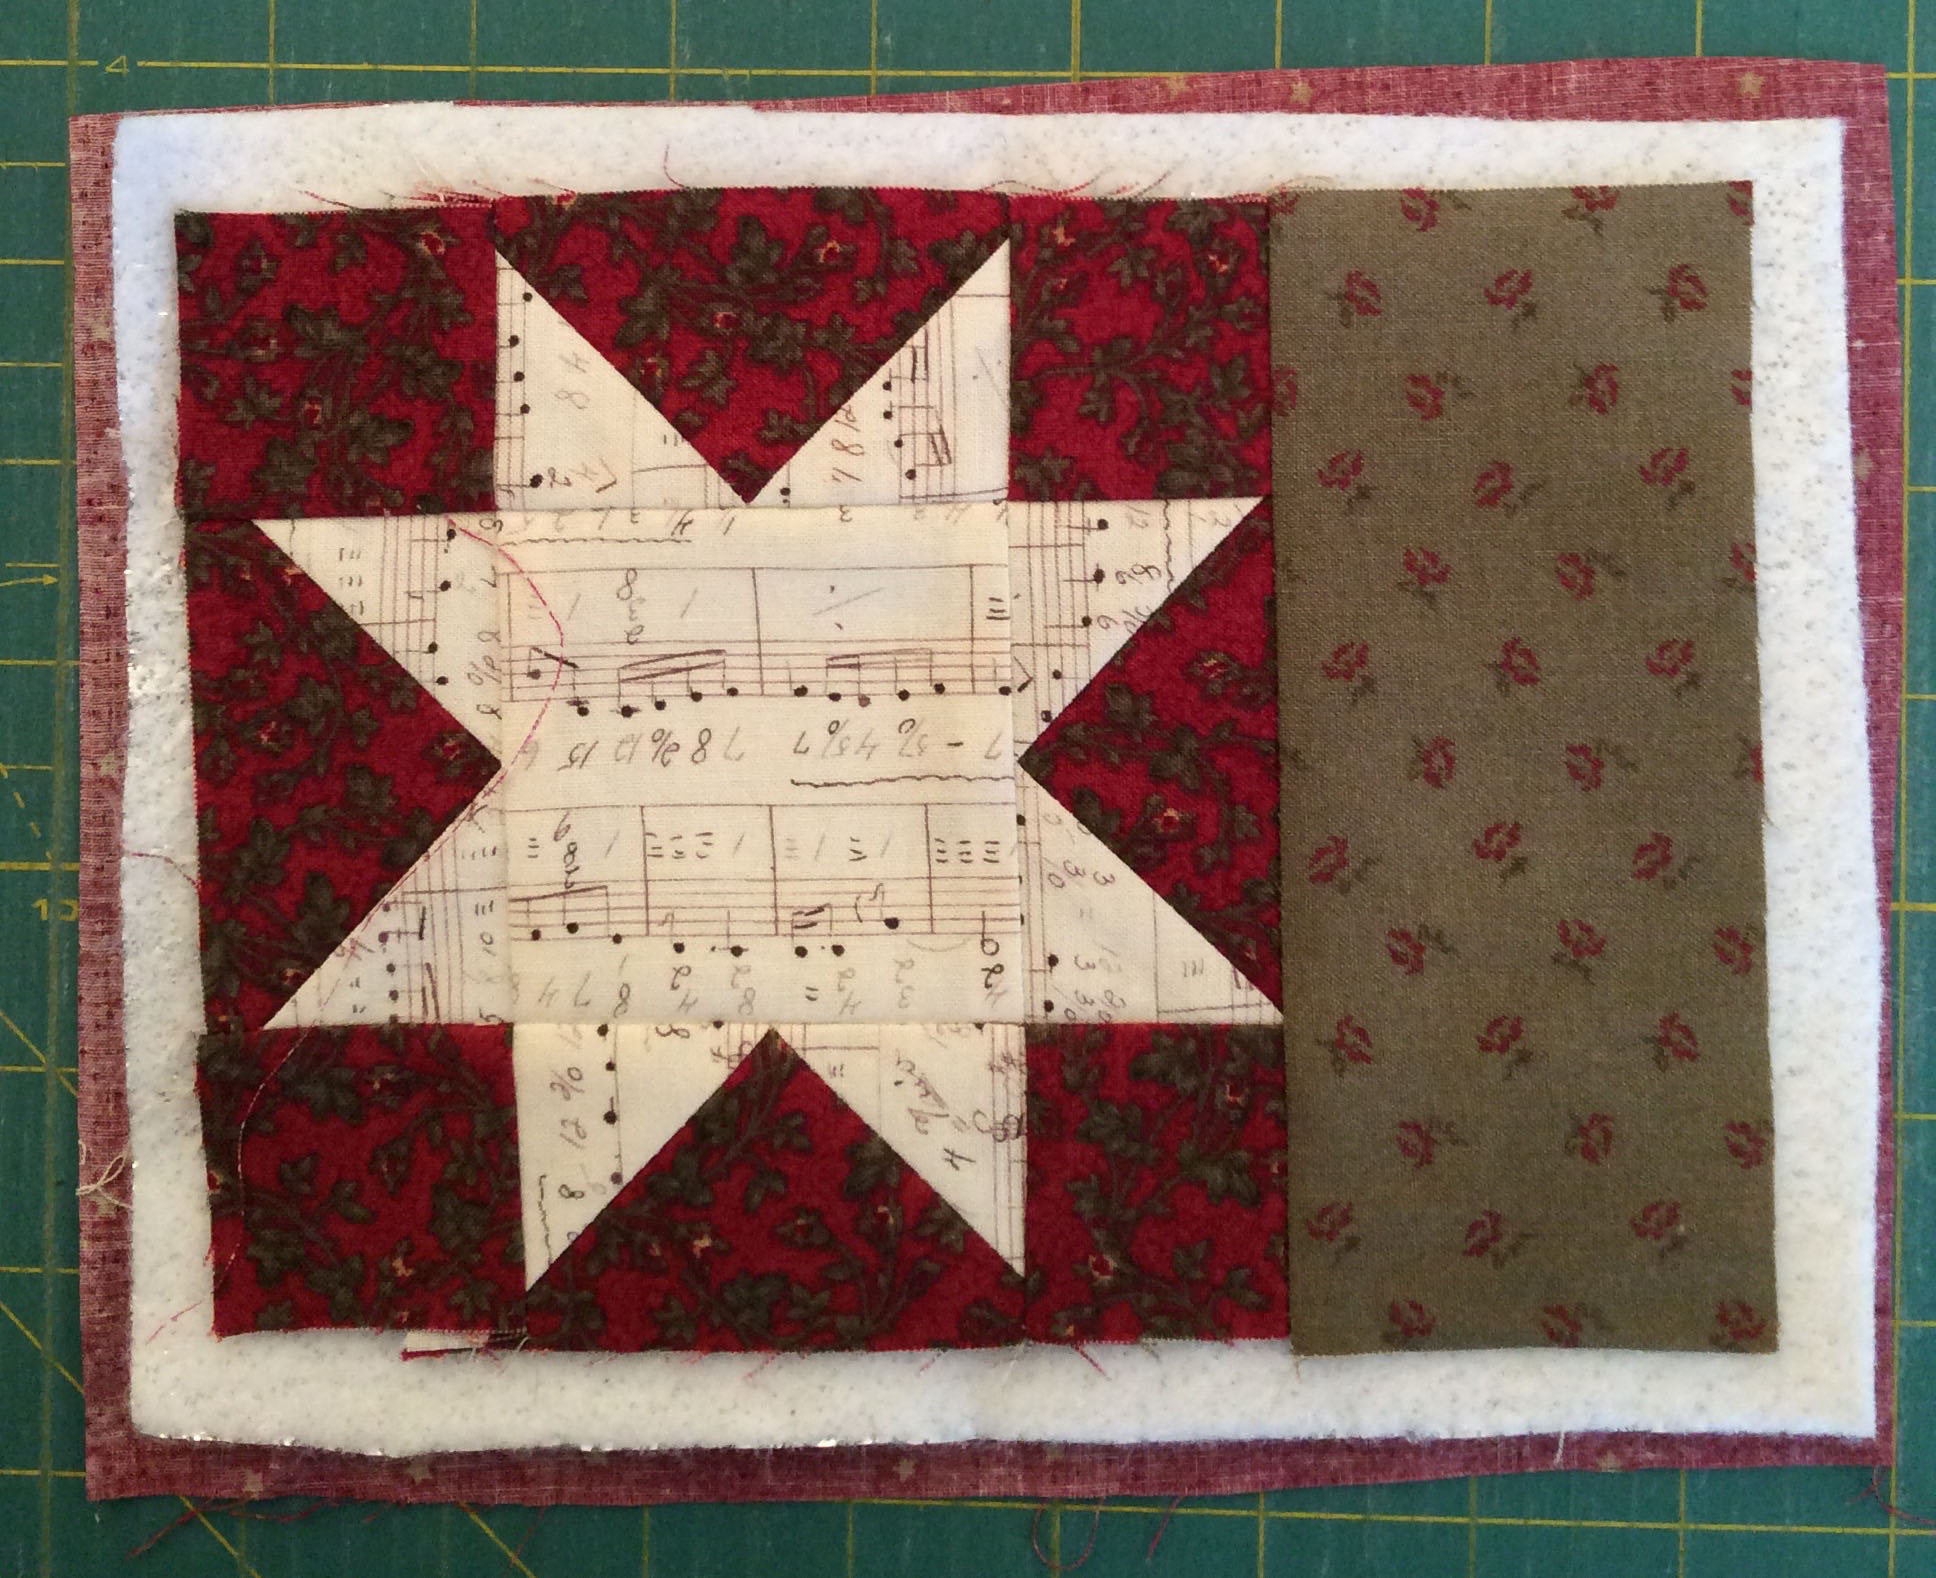
Stitch the border along one side of the star. Press. If you are making the coaster, layer, tack/baste and bind it as follows in steps 3 to 9. If you wish to make the runner, skip to step 9.
Step 3:
Lay the backing WS up, then place the wadding/batting on top, then place the patchwork RS up on top, centrally. Tack/baste the layers together. Spray baste works well here.
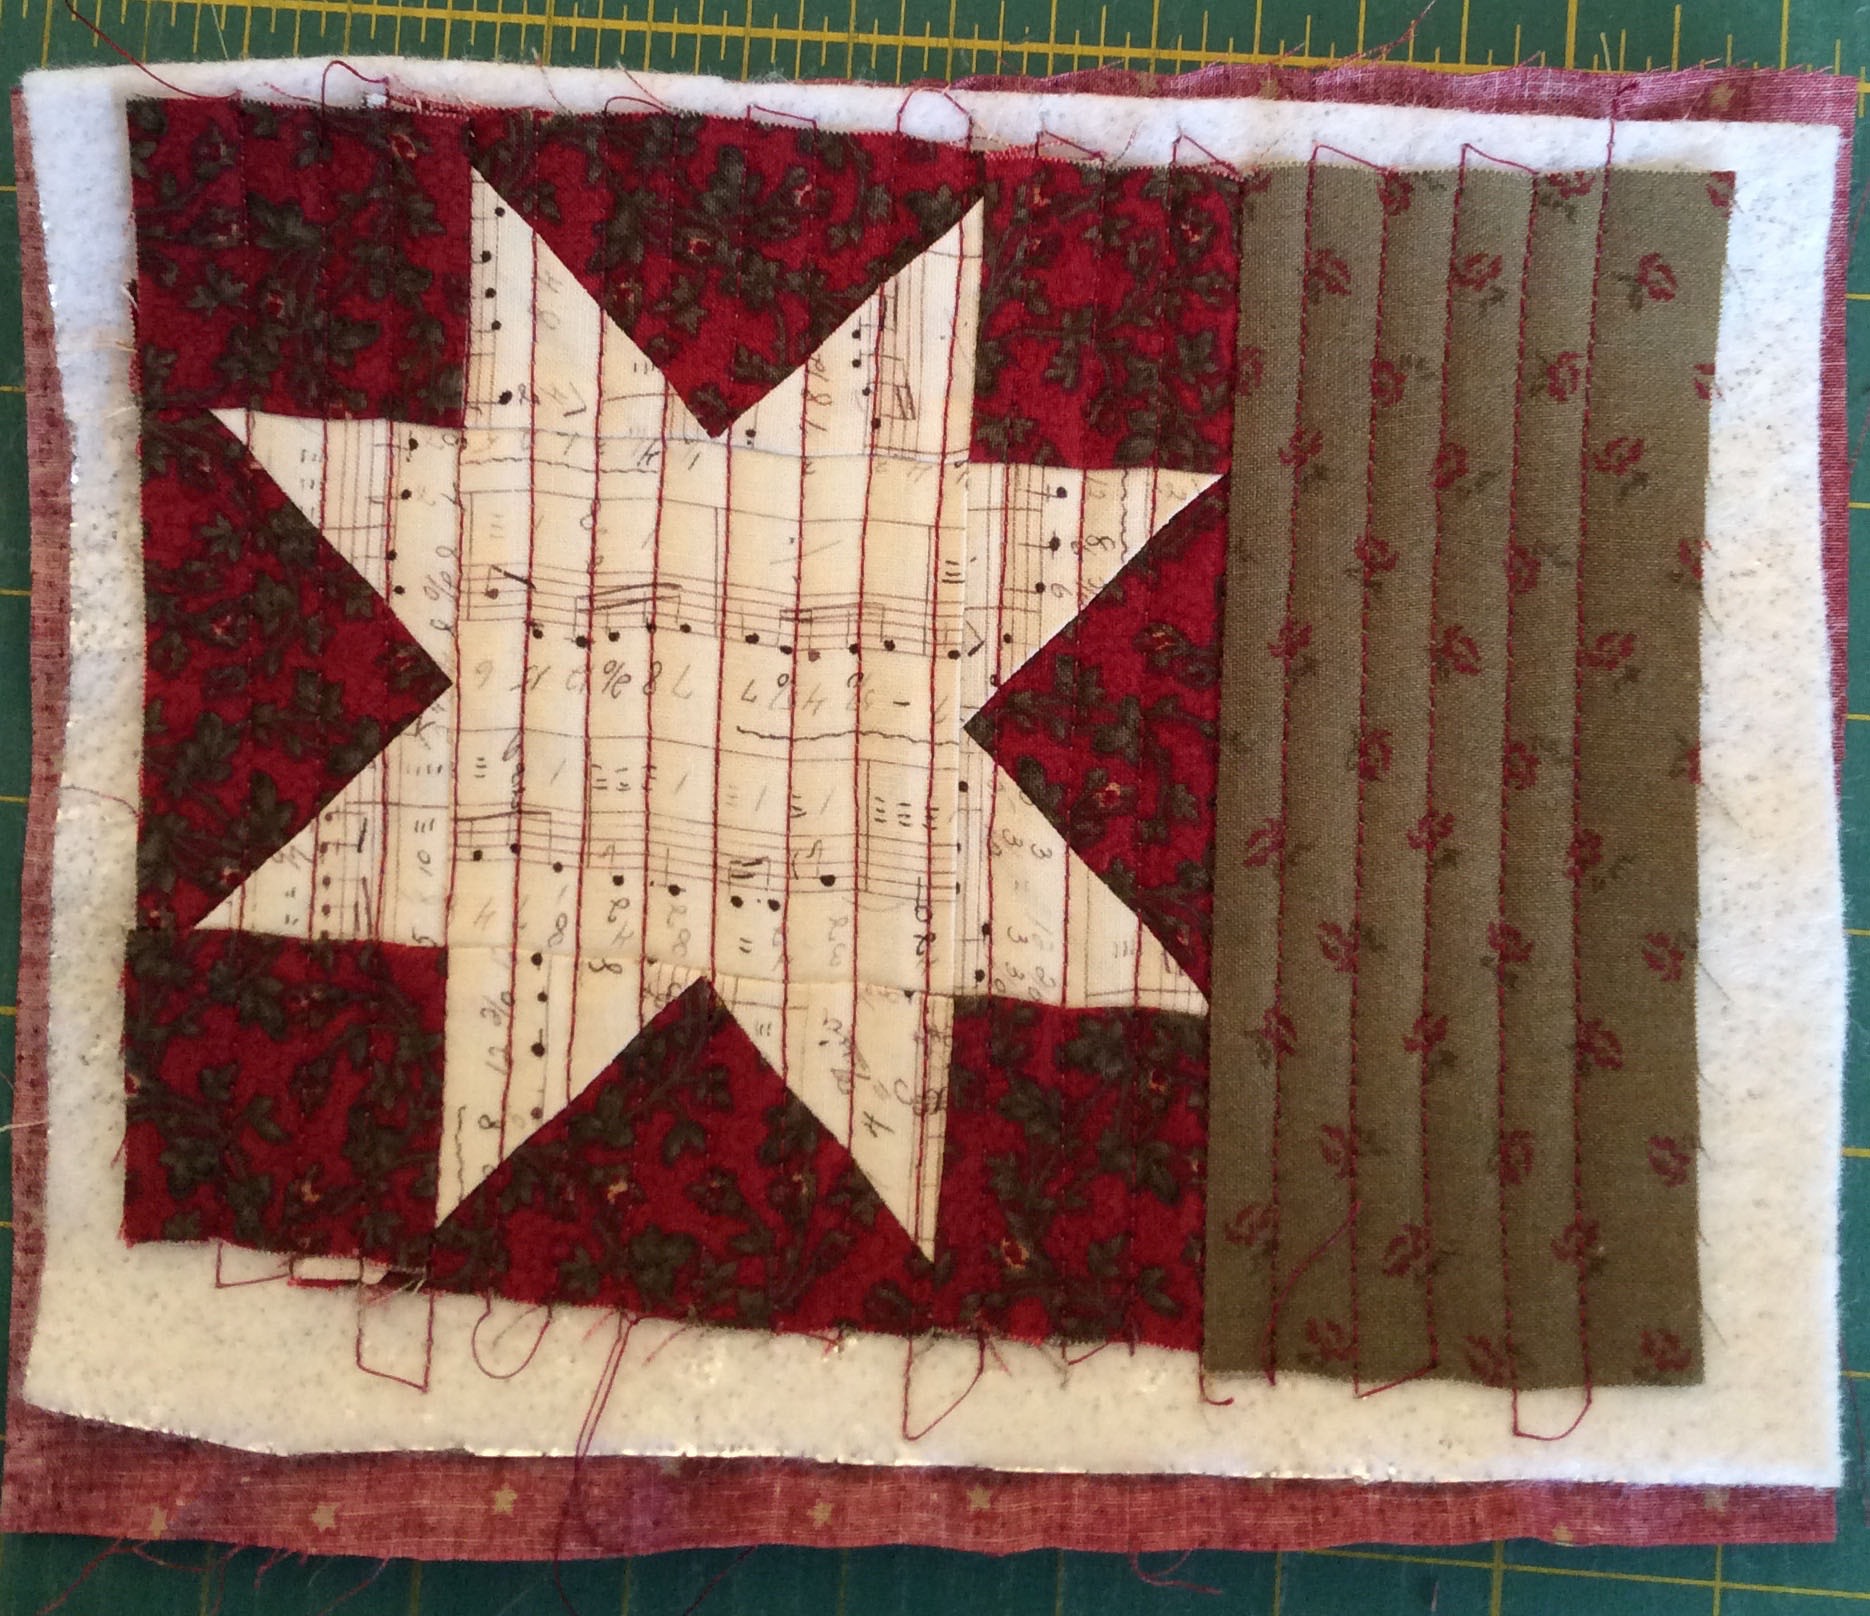
Step 4:
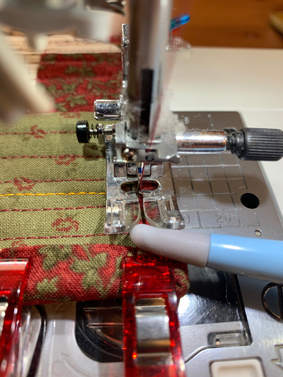
I machine quilted in lines, guided by the sewing machine foot. I covered the patchwork in red quilting, then added random lines of the gold as a highlight. This type of quilting is sometimes called matchstick quilting.
Step 5:
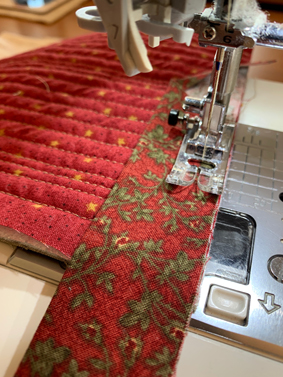
Trim the surplus backing and wadding/batting from the coaster. Use the binding to bind the coaster using your preferred method. I chose to machine bind and machine finish the binding.
This is the same as the usual mitred corner binding, but sewn on from the WS of the quilt. Place your binding strip on the back of your coaster, starting in the middle of one long edge, with the raw edge folded on a diagonal and trimmed. Fold in a 1/4in SA to the wrong side of the binding and start stitch in 1/2in from this edge. You will be tucking the other end of the binding into this when you fi nish. This is a mock bias join, aligning the raw edges.
Step 6:
To turn each corner, sew to within ¼in (5mm) of the fabric edge, then remove the quilt from the machine to refold the binding to go around the corner. Fold the binding strip away from the quilt, keeping the raw edges in line with the quilt. Now fold the binding towards the quilt, aligning the folded corner with the corner of the quilt, and the raw edges with the quilt. Start sewing at the folded edge. Continue to sew. Repeat at each corner. When you get back to the start, insert the binding end into the folded edge.
Step 7:
Turn the binding over to the front of the quilt and keep it in place with binding clips.
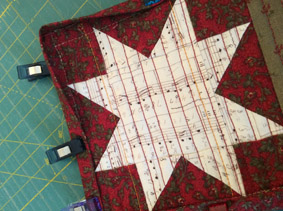
Step 8:
Stitch all the way around the folded edge of the binding, using a pointer to keep the mitres in place at the corners as you stitch.
Step 9:
To make the runner, complete another 11 stars with borders, as in steps 1 and 2.
Step 10:
Lay out the stars with the borders alternating. This gives the stars a staggered effect. Machine stitch them together, then press the seams open.
Step 11:
Lay the backing WS up, then place the wadding/batting on top, then place the Patchwork RS up on top, centrally. Tack/baste the layers together. Spray baste works well here.
Step 12:
To stabilize this long piece of quilting, I quilted between each star fi rst, then filled each one in with the straight lines as in step 4.
Step 13:
When complete, trim and bind as for the coaster in steps 5 to 8.
Download and print this project in full HERE.
20 to Stitch: Mini Block Quilts is available from Search Press, RRP £4.99.
The Joy of Jelly Rolls, RRP £12.99.

Show us your Christmas crafts! Tag us @searchpress or use #SearchPressMakes, we'd love to see them!
Follow us on:


#SearchPressMakes